C_SDK_IIC tutorial_Linux
C_SDK_IIC tutorial_Linux
https://github.com/WITMOTION/WitIIC_JY901
Steps
Wiring problem (this example uses Raspberry Pi 3b+ as an example)
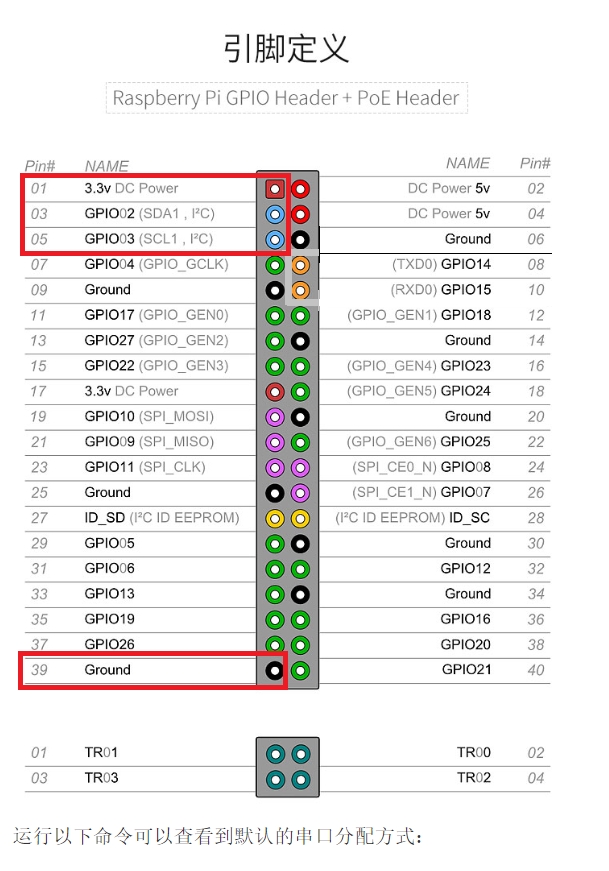
Find the pinout diagram of the Raspberry Pi model you are using
Wiring Method
Raspberry Pi 3b+ JY901S (Virt smart sensor supporting IIC protocol)
3.3V/5V-DC Power <----> VCC
GPIO02(SDA1) <-------> SDA
GPIO03(SCL1) <-------> SCL
Ground <--------------> GND
Check if the i2c-1 file under the device file is open
Command line input:
ls -l /dev/i2c*
If the /dev/i2c-1 shown in the above figure shows that it is open, then jump directly to step 3;
If /dev/i2c-1 does not appear, you need to open the file
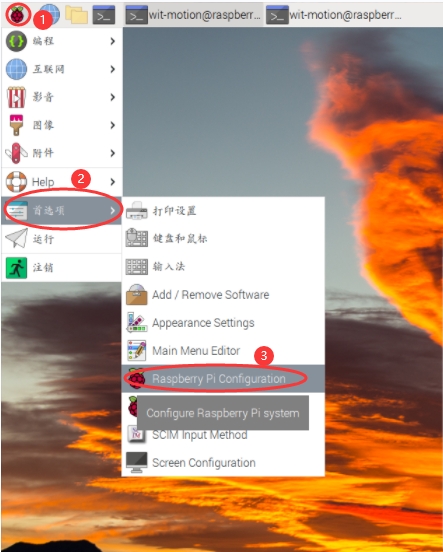
Method one:
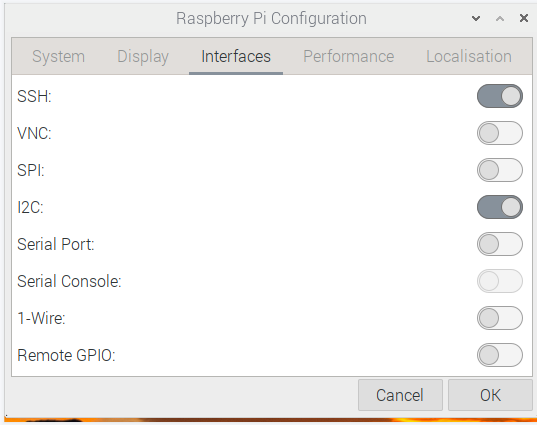
① Click on the Raspberry logo in the upper left corner -> Preferences -> Raspberry Pi Configuration
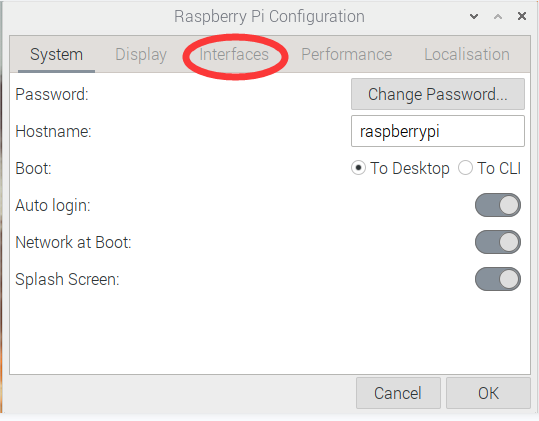
② Click Interfaces
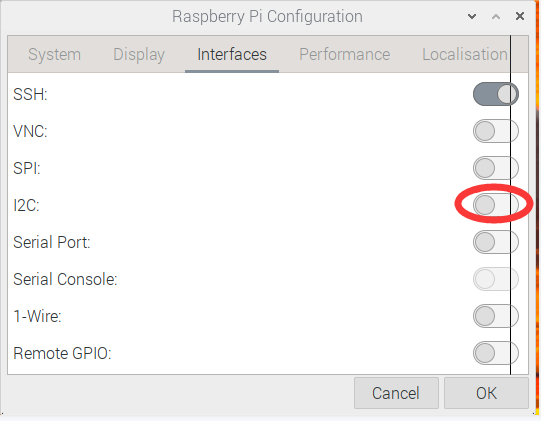
③ Check the option of I2CTh
That is it:
Method Two:
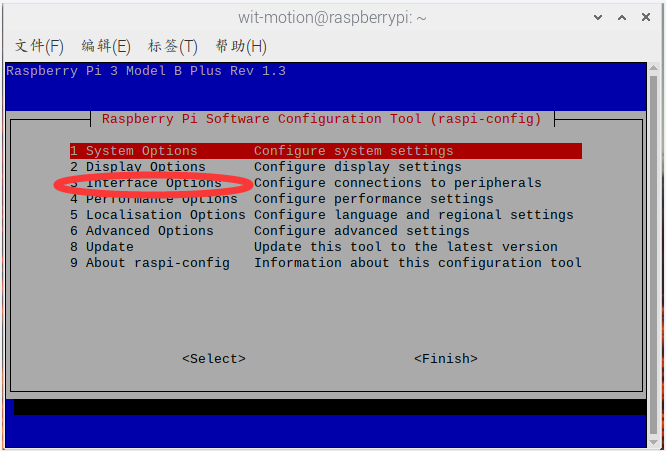
① ctrl+Alt+T to open the terminal
② Command line input: sudo raspi-config, the interface appears, select Interface Options and press Enter
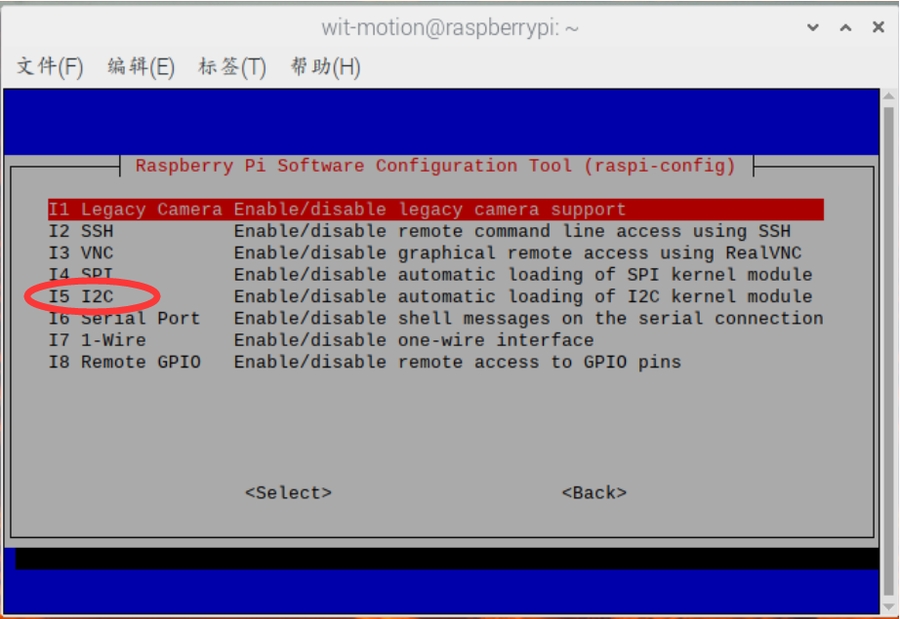
③Select I5 I2C and press Enter
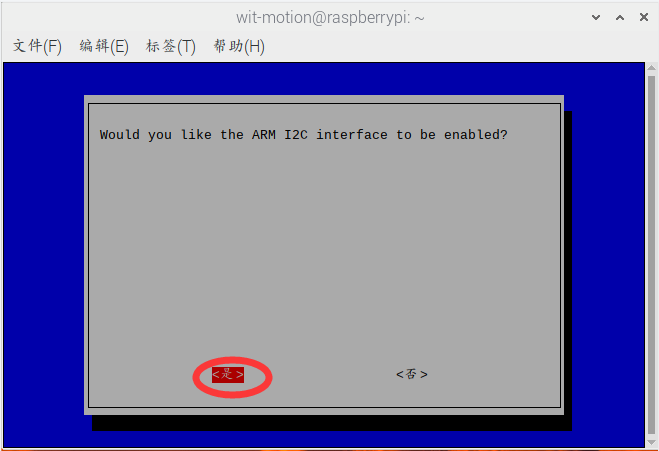
④ Select<Yes>
⑤ Select<Confirm>
⑥Reboot Raspberry Pi
Command line input:
reboot
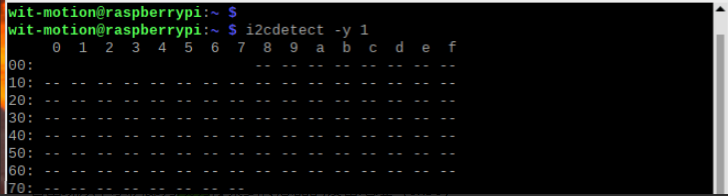
View the device address of the sensor
i2cdetect -y 1
If the following example appears, the device address of the sensor is not found
At this time, it is necessary to check whether the wiring is loose or the wiring is wrong.
If the following example appears, the device address (0x50) of the sensor has been successfully searched
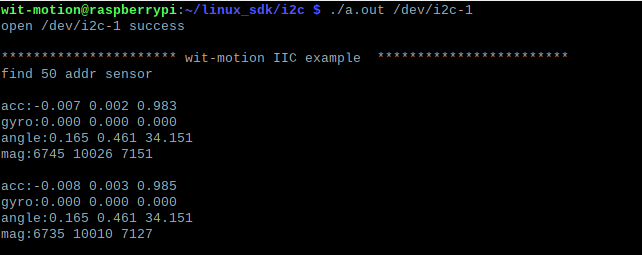
Enter the specified folder and compile and run the program
Command line input:
cd ~/linux_sdk cd ./i2c gcc ./*.c ./a.out /dev/i2c-1
View running results
Prompt information and address information and returned sensor parameter data appear
Shake the sensor, the parameters of the sensor will be sent back and displayed in real time, indicating that the debugging is successful!
More
Please reference to the sensor datasheet.
Last updated